CodeIgniter Introduction & Basics Part 3 – Connecting to Database

Assumption

  • This tutorial is for Mac machines although it can be similar to Windows most of the content is dedicated for Mac users.
  • You already have installed MAMP app to use MySQL Server.

Overview

Connecting to Database

By default CodeIgniter 4 supports multiple types of Database Driver. But in this tutorial we only use the MySQL.

We will use phpMyAdmin to manage our Database and tables. Since we are working on our local machine, we need to have a MAMP app to run our MySQL Server.

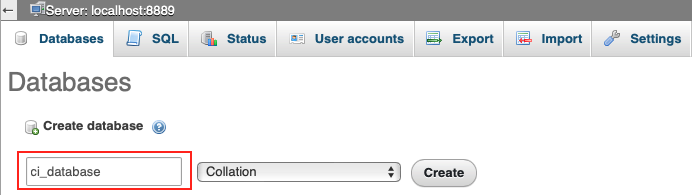
Step 1 – Create a Database

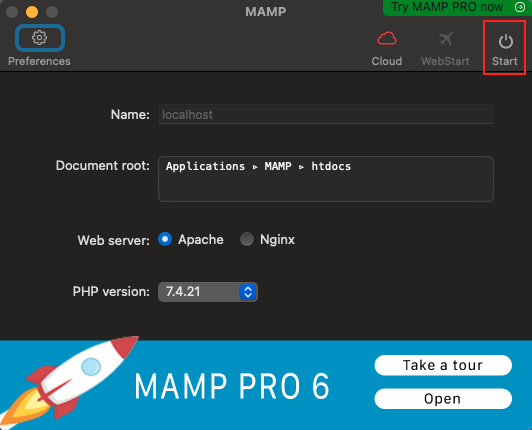
Open your MAMP and click the Start button to run the server.

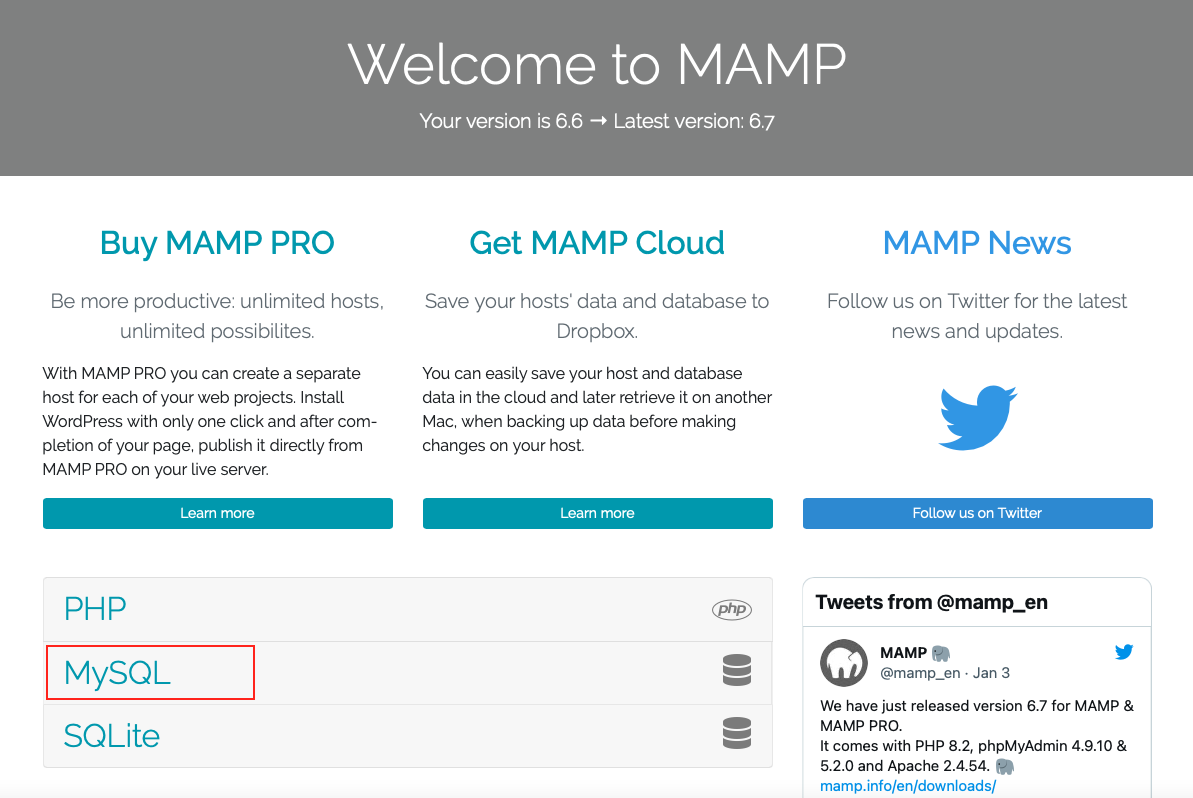
This will open a page on your default browser. Select MySQL
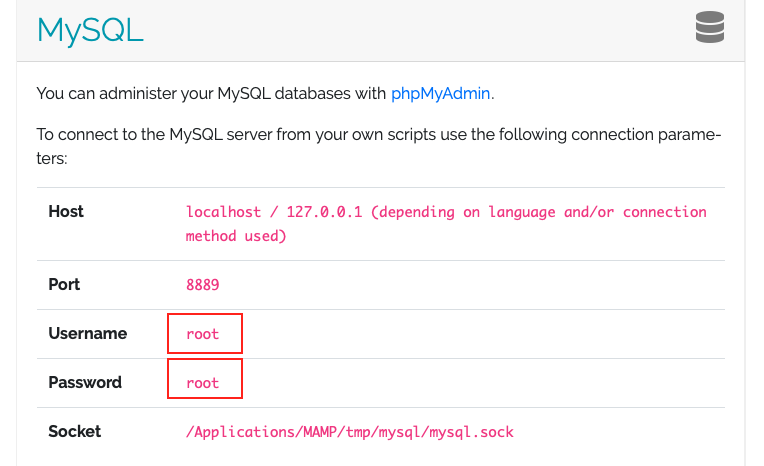
Take note of the Host (127.0.0.1)Username and Password (We will use it later). Then click phpMyAdmin or you can simply type in your browser the following link (the number 5 can vary depending on the version you are using)

http://localhost:8888/phpMyAdmin5/

This will open the phpMyAdmin page.

Select Database from the tab on the top then type in your desired Database Name (e.g. ci_database) and click Create button.

Now we have our Database created!

Step 2 – Connect to Database

In Part 1 of this Tutorial, you have remembered that we have changed one of the files named env into .env (with a preceeding dot (.) ). We need to go back and open that file to setup our database.

Now, fill in the HostNameDatabase, Username and Password we saw from Step 1 on the following lines of codes:

database.default.hostname = 127.0.0.1 
database.default.database = ci_database 
database.default.username = root 
database.default.password = root 
database.default.DBDriver = MySQLi
database.default.DBPrefix = 
database.default.port = 3306

NOTE:
– We already have removed the hash (#) in front of  these codes
– We are using the IP Address instead of localhost
– If we use localhost we cannot issue the command below because it will trigger an error:

php spark migrate:status
3 – Create a Table
Before we start creating a migration file, let’s have a look at the spark commands so we can see all the available options to manage migration. Type the following command in your terminal:
php spark

This will display all the available commands in spark. In the image below, you can see that there are 2 migration commands. The one in the blue box is migrate:create (deprecated). And the one in the red box. We should use the latter instead which is the make:migration.

To dig deeper into the make:migration command, we try to run the following command to see more options:

php spark help make:migration

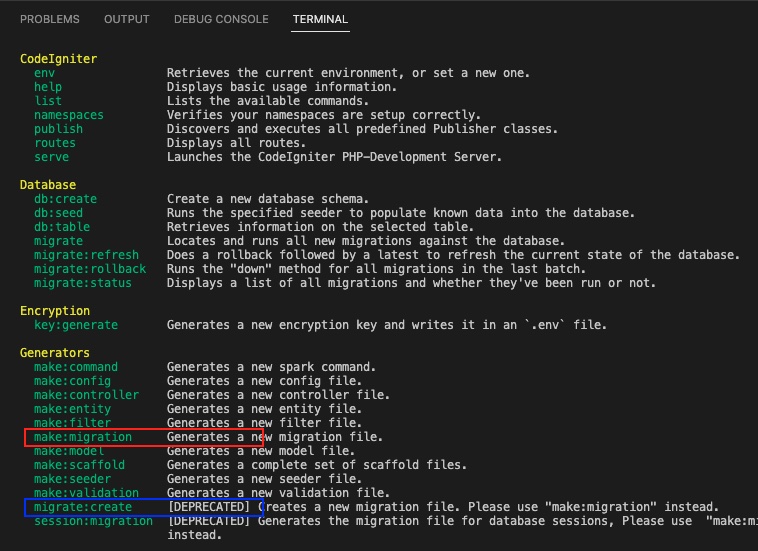
This will display the image below: 

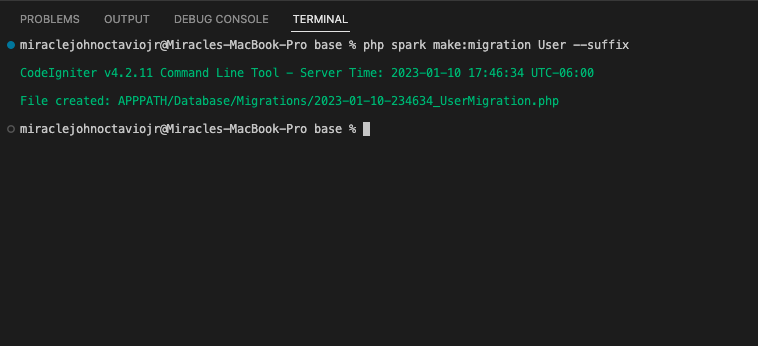
Now, let’s create our Migration File by executing the following code:

php spark make:migration AddUser --suffix

NOTE: We have added the parameter –suffix so that it will create a “yyyy-MM-dd-HHmmss_AddUserMigration.php” instead of yyyy-MM-dd-HHmmss_AddUser.php” only. The new migration file will be generated inside the App > Database > Migrations

The image below will be the result:

Open the Migration File and overwrite the content with this:

<?php

namespace App\Database\Migrations;

use CodeIgniter\Database\Migration;

class AddUserMigration extends Migration
{
    public function up()
    {
        $this->forge->addField([
            'id' => [
                'type' => 'INT',
                'constraint' => 5,
                'unsigned' => true,
                'auto_increment' => true,
            ],
            'named' => [
                'type' => 'VARCHAR',
                'constraint' => 100,
                'null' => false,
            ],
            'email' => [
                'type' => 'VARCHAR',
                'constraint' => 100,
                'null' => false,
                'unique' => true,
            ],
            'updated_at' => [
                'type' => 'datetime',
                'null' => true,
            ],
            'created_at datetime default current_timestamp',
        ])
        $this->forge->addPrimaryKey('id');
        $this->forge->createTable('users');
    }

    public function down()
    {
        $this->forge->dropTable('users');
    }
}
Step 4 – Run Migration

To execute our migration, we can either use a CLI or a Controller. In this Tutorial, we will use a Controller. To create a controller that will migrate our Migration File we run the following code:

php spark make:controller Migrate    

The command above will create a new controller named Migrate.php inside the App > Database > Migrations. The code below will be the content of Migrate.php file.

<?php

namespace App\Controllers;

use App\Controllers\BaseController;

class Migrate extends BaseController
{
    public function index()
    {
        //
    }
}

Let’s add a functionality to process our migration by adding the following code:

$migrate = \Config\Services::migrations();

try {
    $migrate->latest();               // Migrate (Up)
    // $migrate->regress(-1);         // Rollback (down)
} catch (Throwable $e) {
    print'<pre>';print_r($e);print'</pre>';
}
  • Line 4 will perform the migration by using the “up” function with latest migration file.
  • Line 5 will perform a migration roll back by running the “down” function inside the migration file.

Now that we have the Migrate controller, we still can’t access this from our app. We need to add a new router to point in the direction of our Migrate controller. To do this, we need to open our app > Config > Routes.php then add the following code: 

/*
 * --------------------------------------------------------------------
 * Route Definitions
 * --------------------------------------------------------------------
 */

// We get a performance increase by specifying the default
// route since we don't have to scan directories.
$routes->get('/', 'Home::index');
$routes->get('about-us', 'Site::aboutUs');
$routes->get('contact-us', 'Site::contactUs');

$routes->get('migrate', 'Migrate::index');
  • Line 13 is the code we have added to inform CodeIgniter where to find our Migrate controller

From here you can now run your Migration using your Web App. Type the following URL in your browser:

http://localhost:8888/CI-Rest-API/base/public/migrate
Explanation:
  • http://localhost: – This is the hostname used to refer this current device to access network services.
  • 8888 – Since we are using MAMP, this is the default port number it uses to serve our website
  • CI-Rest-API/base/public – This is the root or public_html folder of CodeIgniter. Your website starts from the public folder. 
  • migrate – is the Route we have created to access our migration process.

After we execute the migration process by sending a request to the URL above. We can have a look on our migration status to see if it works by running the following command:

php spark migrate:status

This will be the result