Installation
Step 1 – Create a project folder
- Open your Finder and go to;
/Applications/MAMP/htdocs
- Create a new folder named CI-Rest-API (use any name you want). This is where you want to place your CodeIgniter project.
Step 2 – Install CodeIgniter 4 Framework
- Right-click the folder CI-Rest-API
- Then select New Terminal at Folder from the menu to open up the Terminal app.
- While the Terminal app is active, copy and paste the following command and press enter to execute in the command line
composer create-project codeigniter4/appstarter base
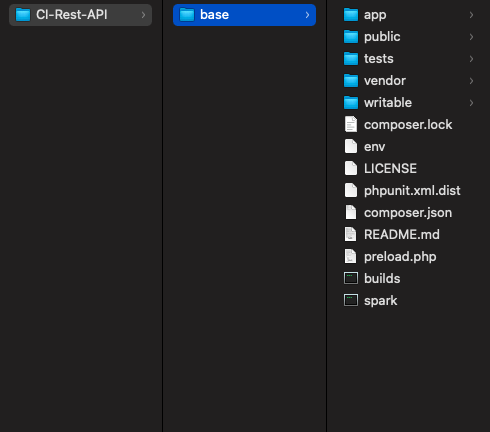
The command above will create a “base” folder. If you omit the “base” argument, the command will create an “appstarter” folder, which can be renamed as appropriate. If you take a look inside the “base” folder, it will contain all the folders and files we need for the CodeIgniter project.
- Go back to Finder
- Notice that the “env” file does not have the dot (.) in front of it? This is used to set Environment Variables by using a “dotenv” file. The term comes from the file name, which starts with a dot before the text “env”.
- It is recommended to make a copy of it and named it “.env” with the dot (.) in front of the name.
IMPORTANT: Make sure the .env file is NOT tracked by your version control system. For git that means adding it to .gitignore. Failure to do so could result in sensitive credentials being exposed to the public.
Renaming the env file can be tricky. So here’s the process of doing it;
- Duplicate the “env” file by pressing the “command+D” — this will create “env copy” file
- Then rename the “env copy” into “env-original”
- If you attempt to rename the duplicate “env” file into “.env” with dot (.), this will trigger an error
- To fix this, you need to press “command+shift+.” to show the system/hidden files
- From there, you can now rename it as “.env”
Step 3 – Open the CodeIgniter project in Visual Studio Code
- Open Visual Studio Code app
- Select File > Open folder…
- Select base
- From the Explorer pane select the file .env
- Uncomment line 17 or remove the #
- Change “production” to “development” — this will enable us (developer) to see the actual error message during debugging
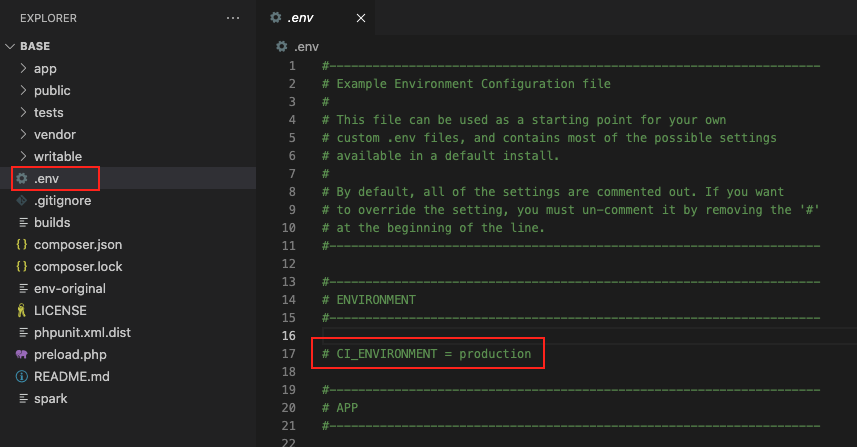
- This will be the result

Step 4 – Test CodeIgniter
- Open the Terminal in your Visual Studio Code located at the top of your window main menu.
- Then type this command
php spark serve
- This will be the result
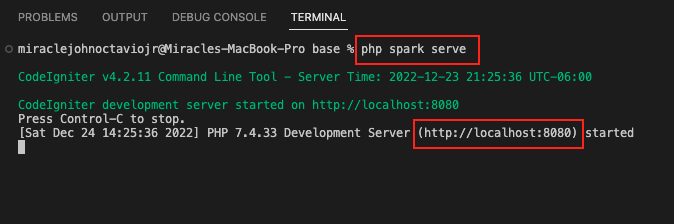
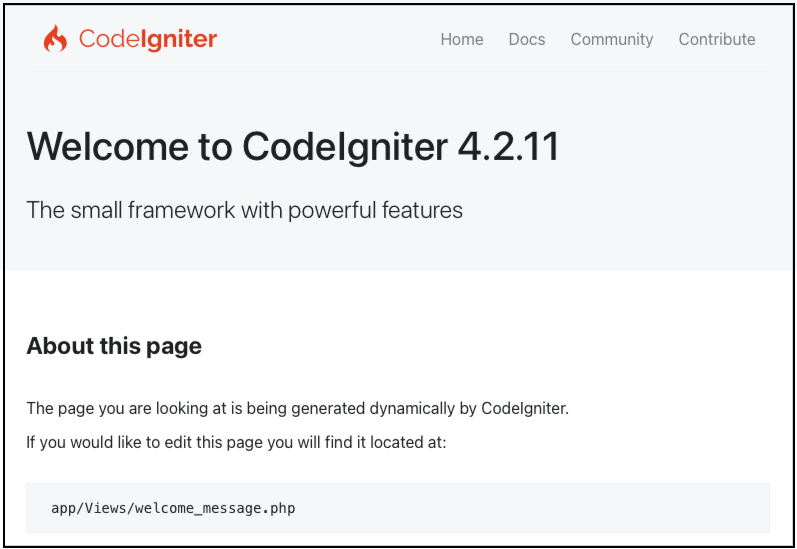
- Now click http://localhost:8080 to open your app from the Browser
- This will be the result
If you want to STOP the server just press control+c.
Understand the Application Default Landing Page
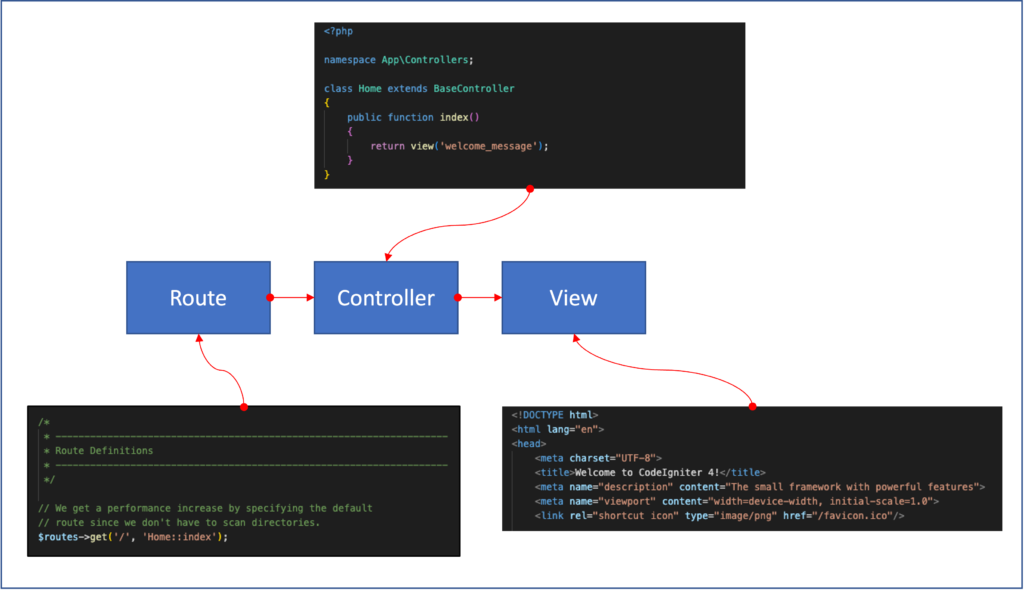
$routes->get('/', 'Home::index');About PHP Spark CLI
Some common Spark commands to use
Run the server
php spark serve
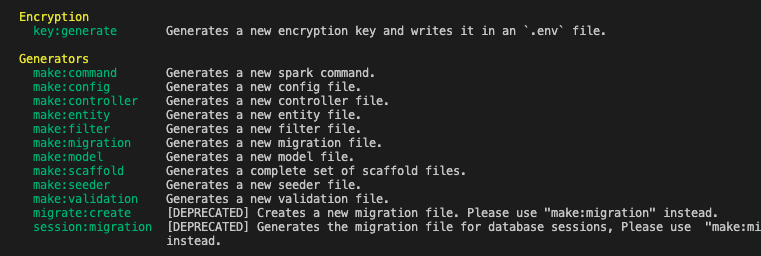
Display the list of commands in Spark
php spark
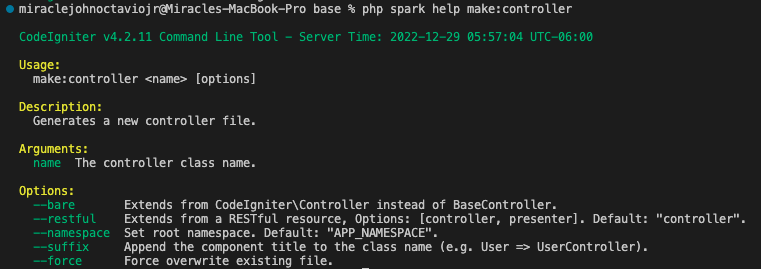
Display the syntax of a command
php spark help <CommandName>
php spark help make:controller
Create a controller inside the controller folder
php spark make:controller <ControlerName>
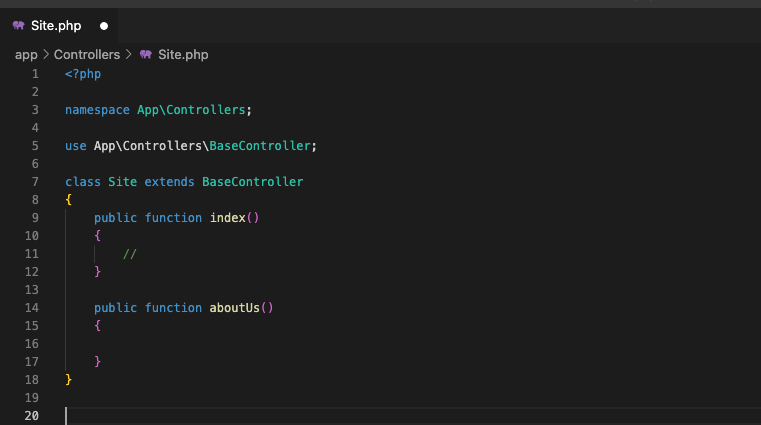
php spark make:controller Site

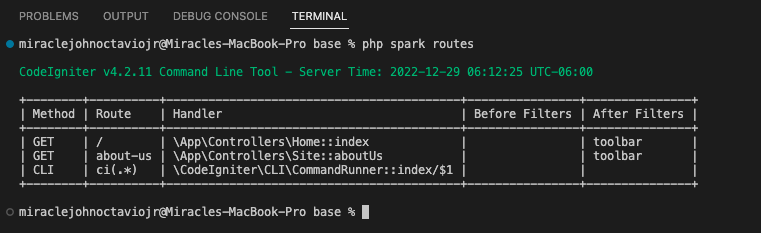
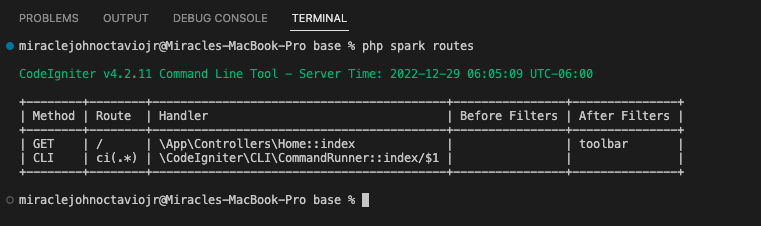
Display the list of routes
php spark routes
Let’s try to add a new route to app/config/Routes.php

Then add aboutUs function to Site controlller
Now run again the spark command, we will now have this with the additional about-us route;